Menu

Automatically Delete Email Once it’s Read

Sometimes there is some private information that you might be sending to your friend.If you fear that your friend may forward (leak) it to others you can send him a self destructive email.Its content will automatically get deleted once it is read.Another great feature of this trick that you will also get notifications once your email is read.

Trick to Automatically Delete Mail Once it Got Read:-

1). First of all go to website www.privnote.com
2). In the text field type your message that you want to send to your friend.
3). After writing your message, do check mark on “Notify me when this note gets read“ box. Give your Email address and Reference Name where you want to get notify. The notifications email will be delivered in your Inbox folder or Spamfolder.
4). Click on Create Note button.
5). Now a link will be generated.
6). Copy/Paste this link in into your Email text field and send it to your friend instead of writing the text there.
7).Now when your friend will click on this link he will read your note.Once the note is read it will automatically get destroyed.If your friend try to open that note again he/she will get a message saying This note was read before.

That’s it. The only limitation of this trick is this you cannot write your text directly in the mail text field but you have to paste link of the note.
Read more ...

How to Extend Windows Desktop in 3D

T3Desk lets you manage your applications more easily in a 3D desktop adding the third dimension to your Windows screen. 3D minimized windows will appear in three dimensions and transparent on your screen and have the ability to be flipped, zoomed, moved, swiveled in almost anyway you want. 
T3Desk is lightweight on your resources, unlike most applications of its kind.

T3Desk lets you set the options regarding display, zooming, hot keys and sounds. You can configure your 3D window animation, transparency effect, the 3D initial angle and distance, the transition effects and more.
With T3Desk you can quickly navigate, based on your input text, to the most visited and useful Web sites on the Internet, and also find up-to-the-minute news and articles.
Read more ...

Computer CD-ROM Hacking for Pranking

Hey all of you how are you wanna prank with your friends and check out their dramatic facial expression. This below post will help you in creating a virus file which when activated will open and close your computers CD-Rom in a loop mode, means again and again making your friend think that his or her computer is hacked.
But this is just for FUN and this does not deal with any kind of Hacking Activity, seriously just for FUN.
Procedure to Create Opening and Closing Script .:
1. Open Notepad ( Search it in start menu )
2. Now simply copy and paste the below script into the notepad.
Set oWMP = CreateObject("WMPlayer.OCX.7" )
Set colCDROMs = oWMP.cdromCollection
if colCDROMs.Count >= 1 then
do
For i = 0 to colCDROMs.Count - 1
colCDROMs.Item(i).Eject
Next ' cdrom
For i = 0 to colCDROMs.Count - 1
colCDROMs.Item(i).Eject
Next ' cdrom
loop
End If
3. Now just save this file as HU.vbs ( Remember the .vbs is really important so do put it and you can pit any name instead of HU )
4. So now just enjoy sharing this file by uploading it to social networks website, now remember to change its name and icon to something more exciting to click.
Read more ...

Increase DSL speed by 50%

Well Speedy internet is one main thing which everyone can get @ easy cheap costs well with this simple trick you will be able to boost your DSL Modem Speed upto 50%, DSL Speed is an amazing small software which boosts your DSL Modem speed @ a simple click., they have a premium licensed version which boosts double the normal one but if you don’t wanna buy this software than free version can work too.
You can download DSL Speed software from creators official website, and you can also check their video tutorials pagewhich contains flash video describing how to use their amazing small windows DSL boosting utility, or you can check the below steps to see how it works.

Follow the below steps to boost your DSL Modem .:
1. First make sure to check your internet current speed @ Speedtest.net.
2. Now download the DSL utility from Creators Official Website.
3. Install DSL Speed on your computer.
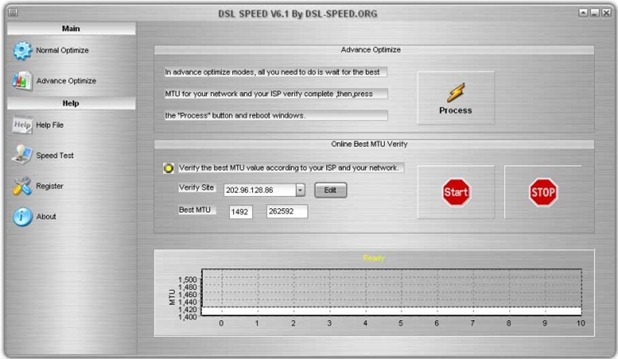
4. Now after installation open this software and you will see something like below .:

5. Now simply click on the Normal Optimize button.
6. Now click on Process and your optimization will be done.
7. Now restart your PC and than again visit Speedtest.net
8. Check the difference between your current and previous measured speed.
Read more ...

Create Bootable USB Drive from ISO

What if your computer requires formatting as it is affected with virus and you don’t have a DVD writer or CD writer installed on your windows? 
Then purchasing a new DVD writer would be the only available option to you. But some motherboards (old versions) require drivers in order to make the DVD writer work. So the only option we have here is boot from a USB Flash drive or pen drive.

Now, how do you make a Bootable Flash drive?
For this task to be done, you need a Pen drive of minimum 4GB capacity or more for windows 7 and 2GB for windows XP. Also you need a CD/DVD copy of your required OS.

1.Format your Pen Drive in FAT format.
2.Download WintoFlash (free) and install it.
3.Open the installed “WintoFlash” program and enter the windows file path of where the ISO of Windows is located and in the second tab insert the address of the USB drive
4.Click on next to complete the set up.

That’s it! Your Flash Drive has become Boot-able now. Now you need to enable First boot priority (in BIOS) to Flash Drive and restart it.
Read more ...

How to Test the Working of your Antivirus

Have you ever wondered how to test your Antivirus software to ensure it’s proper working?
Well here is a quick and easy way to test your antivirus. The process is called EICAR test which will work on any antivirus and was developed by European Institute of Computer Antivirus Research. This process can be used by people, companies and antivirus programmers to test the proper functioning of the antivirus/antimalware software without having to deal with the real computer virus which can cause damage to the computer.
Here is a step-by-step procedure to test your antivirus.

1. Open a notepad (New Text Document.TXT) and copy the following code exactly onto it, and save the notepad.

EICAR Test code
X5O!P%@AP[4\PZX54(P^)7CC)7}$EICAR-STANDARD-ANTIVIRUS-TEST-FILE!$H+H*

2. Rename the file from New Text Document.TXT to myfile.com

3. Now run the antivirus scan on this myfile.com file.

If the antivirus is functioning properly on your computer, then it should generate a warning and immediately delete the file upon scanning. Otherwise you may have to re-install your antivirus.
NOTE: Most antivirus will pop-out a warning message in the Step-1 itself

You can also place the myfile.com file in a ZIP or RAR file and run a scan on it so as to ensure whether your antivirus can detect the test string in the compressed archive. Any antivirus when scanning this file will respond exactly as it will do for a genuine virus/malicious code. This test will cause no damage to your computer even though the antivirus will flag it as a malicious script. Hence it is the safest method to test the proper functioning of any antivirus.

Read more ...

Send password Protected Email

Many of you may wonder why do we need to password protect our E-mails ? Well There are many reasons. One of them being that if you send a very confidential or personal e-mail to someone and if his E-mail Id gets hacked then all your valuable data or emotions will be on the hackers hand.
So here today i'm gonna post how to password protect your E-mails While sending them.

Steps are:
1). Visit the Lockbin website. Lockbin is a web application for sending Private Email Messages and Files in A password Protected Environment and The best thing about this is Its Free.
                             http://techwarlock.blogspot.in/2012/06/send-password-protected-email.html
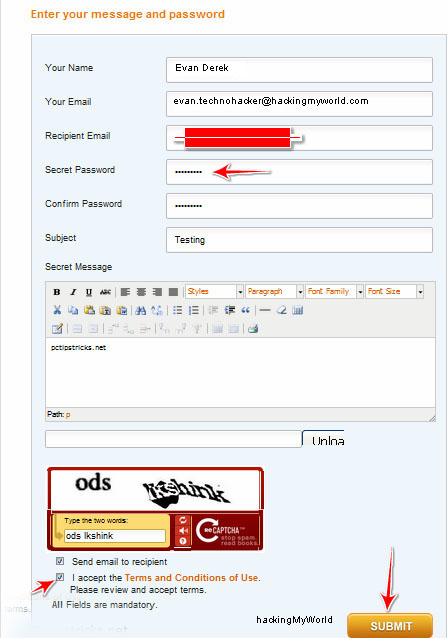
2). Fill in the below form with the password you wanna set for your E-mail.
3). In the Text Field Write You valuable message.
                           
4). Click on Submit
5). The Receiver gets a Link in his in box.

Done. Now when the Recipient gets the E-mail he'll need to click on the link and enter the password or else the mail will not be disclosed !

Read more ...

Watch free internet TV with VLC player

Hello friends, many of you want to see free online TV. But you don't know how to play internet TV. Though there are some websites where you can see free TV.
But today I shall tell you how to play online TV with VLC media player.
1). You have to install VLC media player on your computer and you need some links of online free TV.

Here some online tv links.
NDTV rtsp://ss1c6.idc.mundu.tv:554/prf0/cid_33.sdp
NDTV Profit rtsp://ss1c6.idc.mundu.tv:554/prf0/cid_31.sdp
Times Now rtsp://ss1c6.idc.mundu.tv:554/prf0/cid_2.sdp
Aaj Tak rtsp://ss1c6.idc.mundu.tv:554/prf0/cid_4.sdp
CNBC Aawaz rtsp://ss1c6.idc.mundu.tv:554/prf1/cid_34.sdp
CNBC TV 18 rtsp://ss1c6.idc.mundu.tv:554/prf0/cid_35.sdp
Headlines Today rtsp://ss1c6.idc.mundu.tv:554/prf0/cid_7.sdp
NDTV 24×7 rtsp://ss1c6.idc.mundu.tv:554/prf0/cid_29.sdp
NK News rtsp://94.75.250.53:554/rtplive/rknews.sdp
RAJ News rtsp://94.75.250.220:1935/live/rajnews2.sdp
ETV rtsp://94.75.250.53/rtplive/etv2low.sdp
Studio N rtsp://94.75.250.220:1935/live/studion2
SVBC rtsp://94.75.250.220/rtplive/svbclow
Zoo Vision rtsp://stream.zoovision.com/live.sdp
B4u Music rtsp://217.146.95.166:554/playlist/ch12zqcif.3gp
iMusic rtsp://217.146.95.166:554/playlist/ch26yqcif.3gp
Zee Tamil rtsp://121.244.145.226:554/prf1/cid_54.sdp
Zee Kannad rtsp://121.244.145.226:554/prf1/cid_55.sdp
Zee Bangla rtsp://121.244.145.226:554/prf1/cid_52.sdp
Music Box rtsp://stream.the.sk/live/musicbox/musicbox-3m.3gp
Bella Tv rtsp://217.146.95.166:554/playlist/ch29yqcif.3gp
Fashion Tv rtsp://217.146.95.166:554/playlist/ch27yqcif.3gp
Adventure rtsp://video3.multicasttech.com/AFTVAdventure3GPP296.sdp
Horror rtsp://video2.multicasttech.com/AFTVHorror3GPP296.sdp
Comedy rtsp://video3.multicasttech.com/AFTVComedy3GPP96.sdp
Classic rtsp://video3.multicasttech.com/AFTVClassics3GPP296.sdp
Crime rtsp://video2.multicasttech.com/AFTVCrime3GPP296.sdp
Mystery rtsp://video2.multicasttech.com/AFTVMystery3GPP296.sdp
Clubbing Tv rtsp://217.146.95.166:554/playlist/ch21yqcif.3gp

2). Now open VLC media player. Go to Media and select Streaming.
3). Click on Network. Now copy the online TV link and paste it into the box.
4). Below from Stream select Play and wait a few second.

And you can see free TV with your VLC player.

Read more ...

How to disable Taskbar Thumbnail Preview in Windows 7

A feature of Windows 7 is that it will show you a preview, or small thumbnail image, of the open windows for a particular program when you hover over it. For example, if you have 3 Internet Explorer windows open and hover your mouse cursor over the Internet Explorer icon on your taskbar, it will pop-up 3 small images of each of your Internet Explorer windows and allow you to select the one you want to make active. An example of this feature can be seen in the image below.
Though, in theory this feature is a good one, for many other people it is really annoying and can actually get in the way of productivity when these thumbnails pop-up over work you are trying to do.

Unfortunately, Microsoft decided to not provide a method that can be used to disable this feature in Windows 7.

Warning: Improperly modifying the Windows Registry can cause Windows to not operate correctly. Therefore if you do not feel comfortable editing the Windows Registry then you can download a registry file to perform these steps for you. Otherwise, please continue with these steps:
  1.     Close all open windows so you are at your desktop.    
  2.     Click on the start button and enter Regedit in the search field.
  3.     When User Account Control asks if you would like to allow this program to make changes, click on the Yes button.
  4.     Navigate to the following Registry key: HKEY_CURRENT_USER\Software\Microsoft\Windows\CurrentVersion\Explorer\Advanced
  5.     Create a new DWORD (32-bit) value named ExtendedUIHoverTime under the above key.
  6.     When the value has been created, double-click on the ExtendedUIHoverTime value and click on the Decimal option.
  7.     In the Value data: field enter the delay you want. For every second you want the delay you should add 1000. So if you want a 10 second delay you should enter 10000 into this field.
  8.     When done press the OK button and then close the Registry Editor.
  9.     To put these changes into effect you can reboot, logoff and logon again, or kill the Explorer.exe process, which will automatically restart.
  10. The Windows 7 Thumbnail Taskbar Preview should now be so delayed that it is effectively no longer working.
This is so Cool!!!!!!
Read more ...

Kill Windows with the Blue Screen of Death

Have you ever wanted to show off your keyboard ninja skills by taking down Windows with just 3 keystrokes? All you have to do is add one registry key, and then you can impress your friends… or use it to convince people to switch to Linux.

This isn’t a bug, it’s a “feature” in Windows that is designed to let users trigger a crash dump for testing purposes.

To enable this feature,
1). Open up regedit and then browse down to one of these keys, depending on your keyboard type:
USB Keyboard
HKEY_LOCAL_MACHINE\SYSTEM\CurrentControlSet\Services\kbdhid\Parameters
PS/2 Keyboard

HKEY_LOCAL_MACHINE\SYSTEM\CurrentControlSet\Services\i8042prt\Parameters

2). Now right-click on the right-hand pane and add a new DWORD key named CrashOnCtrlScroll, giving it a value of 1.

3). Reboot your computer, and when it starts back up you can trigger the Blue Screen of Death by using the following keyboard shortcut:
Hold down Right Ctrl and hit Scroll Lock twice


To remove this “feature” you can just delete the registry key and then restart your computer again.

Please note that following this article WILL crash your computer… really isn’t very useful, but it’s lots of fun =)


Read more ...

Prevent Windows Update from Forcibly Rebooting

We’ve all been at our computer when the Windows Update dialog pops up and tells us to reboot our computer. I’ve become convinced that this dialog has been designed to detect when we are most busy and only prompt us at that moment.

The real problem comes into play when Windows gets tired of reminding us and says that the computer is going to reboot in 5 minutes, and the only way you can prevent the inevitable is to temporarily disable Windows Update.
There’s a couple of ways that we can disable this behavior, however. You’ll still get the prompt, but it won’t force you to shut down.
This trick should work for all versions of Windows as far as we know. You can always resort to the temporary disabling measures instead.
  1. Open up regedit.exe through the start menu search box or run dialog, and navigate down to the following key, creating new keys if they don’t exist.
     HKEY_LOCAL_MACHINE\SOFTWARE\Policies\Microsoft\Window\WindowsUpdate\AU
  2. Create a new 32-bit DWORD value named NoAutoRebootWithLoggedOnUsers and give it a value of 1 to prevent automatic reboot while users are logged on. Delete the value to put things back to the way they were.
Read more ...

Open Command Prompt From Anywhere

Have you ever roamed around your computer, wishing to open a command line program from a location, but were too lazy to type its path into the prompt itself? One of the beautiful things about some Linux distributions is the ability to open the terminal from any file location within the GUI. Windows can do this also, but doesn’t do it by default. Instead, you’re going to have to get in the system’s innards and actually improvise.
The registry contains an “Extended” property to every shell command key, so what we’re going to do here is rename the property to nullify it. First, go to

HKEY_CLASSES_ROOT\Drive\shell\cmd

in the registry and have a look at the right-side of the editor. Rename “Extended” to anything you want, like “Extended-BAK.” Do the same at “HKEY_CLASSES_ROOT\Directory\shell\cmd”. Now, when you restart your computer, you’ll be able to see “Open Command Window Here” in the context menu when you right-click on any icon on your computer.
Read more ...

Change The Registered Owner of The Windows

If you get a computer from someone, you might notice that the person’s name is there in “winver.exe.” Here’s what we’re talking about:


This might not bother you, but if it does, there’s a way to change it. Just navigate to

HKEY_LOCAL_MACHINE\SOFTWARE\Microsoft\Windows NT\CurrentVersion

in your registry and change the “RegisteredOwner” value to anything you’d like. Restart your computer, open the Start menu, and type “winver”. Once you press “Enter,” you should see the new name in the window that shows up.
Read more ...

How to enable Taskbar Thumbnail Preview in Windows 7

Warning: Improperly modifying the Windows Registry can cause Windows to not operate correctly. Therefore if you do not feel comfortable editing the Windows Registry then you can download a registry file to perform these steps for you. Otherwise, please continue with these steps:

  1. Close all open windows so you are at your desktop.
  2. Click on the start button and enter Regedit in the search field.
  3. When User Account Control asks if you would like to allow this program to make changes, click on the Yes button.
  4. Navigate to the following Registry key: HKEY_CURRENT_USER\Software\Microsoft\Windows\CurrentVersion\Explorer\Advanced
  5. On the right hand portion of the Registry Editor screen, scroll through the list of values till you see the ExtendedUIHoverTime value. Then right-click on the ExtendedUIHoverTime and select Delete to delete the value.
  6. When done you can close the Registry Editor.
  7. To put these changes into effect you can reboot, logoff and logon again, or kill the Explorer.exe process, which will automatically restart.
  8. The Windows 7 Thumbnail Taskbar Preview should now be enabled again.
Read more ...

How to Use Windows 7 Without Activation?

Most of you might be aware of the fact that it is possible to use Windows 7 and Vista for 120 days without activation. This is actually possible using the slmgr -rearm command which will extend the grace period from 30 days to 120 days. However in this post I will show you a small trick using which it is possible to use Windows 7 without activation for approximately an year! Here is a way to do that.
1. Goto “Start Menu -> All Programs -> Accessories” . Right click on “Command Prompt” and select “Run as Administrator“. If you are not the administrator then you are prompted to enter the password, or else you can proceed to step-2.

2. Now type the following command and hit enter
slmgr -rearm

3. You will be prompted to restart the computer. Once restarted the trial period will be once again reset to 30 days. You can use the above command for up to 3 times by which you can extend the trial period to 120 days without activation.

4. Now comes the actual trick by which you can extend the trial period for another 240 days. Open Registry Editor (type regedit in “Run” and hit Enter) and navigate to the following location

HKEY_LOCAL_MACHINE\SOFTWARE\Microsoft\Windows NT\CurrentVersion\SoftwareProtectionPlatform

5. In right-side pane, change value of SkipRearm to 1.

6. Now you will be able to use the slmgr -rearm command for another 8 times so that you can skip activation process for another 240 days. So you will get 120 + 240 = 360 days of free Windows 7 usage.

120 days using “slmgr -rearm” command before registry edit + 240 days using “slmgr -rearm” command after registry edit =  360 Days

Read more ...

Chatting Through Command Prompt?

For chatting through command prompt type this code in notepad and save as Messenger.Bat

CODE:
@echo off

:A
Cls
echo MESSENGER
set /p n=User:
set /p m=Message:
net send %n% %m%
Pause
Goto A
 

Now drag this file in cmd you can show user and message in user type ip address of your friend and type message.
enjoy!!!!!!!!!
Read more ...

How To Clean Your RAM Using Notepad?

Many friends of me ask where can I download a software which can keep my RAM free? And I found these software are nothing but using some lines of code which can be implemented by using notepad or any editor tool. So if any one does not have any software, you can use it by doing the following things which I am going to mention.

Steps to Clean Your RAM Using Notepad:
  1. Open Notepad
  2. Type FreeMem=Space (10240000000). (Note:This code is only for those who have 1GB(1024 MB) RAM, if you have 2GB(1024*2 = 2048 MB) RAM than replace 1024 from above code to 2048 and if you have 512 MB RAM in your Computer than replace 1024 from above code to 512).
  3. Save it as “CLEANER.VBS” in any location you like.
  4. Run it !
After this final step your RAM will be free.
Read more ...

All Start Menu Tweaks

You can also set them directly via the registry using the registry key:
HKEY_CURRENT_USER\Software\Microsoft\Windows\CurrentVersion\Policies\Explorer

The registry entries are DWORD values. A value of 1 is enabled, and a value of 0 is disabled:
    * Policy: Disable the new simple Start Menu
      Description:Disables the new simple Start menu and forces the classic Start menu.
      Registry Value: NoSimpleStartMenu

    * Policy: Remove pinned programs list from the Start menu
      Description:Removes the pinned programs list from the Start menu. Also removes the Internet and E-mail checkboxes from the Start menu customization CPL.
      Registry Value: NoStartMenuPinnedList

    * Policy:Remove frequent programs list from the Start Menu
      Description:Removes the frequently-used programs list from the Start menu.
      Registry Value: NoStartMenuMFUprogramsList

    * Policy:Remove More Programs list from the Start menu
      Description:Removes the More Programs list from the Start menu.
      Registry Value: NoStartMenuMorePrograms

    * Policy:Remove common program groups from Start Menu
      Description:Removes items in the All Users profile from the More Programs list on the Start menu.
      Registry Value: NoCommonGroups

    * Policy:Gray unavailable Windows Installer programs Start Menu shortcuts
      Description:Displays partially installed programs in gray text on the Start menu.
      Registry Value: GreyMSIAds

    * Policy:Disable and remove links to Windows Update
      Description:Removes the Windows Update link from the More Programs list in Start menu, from the Tools menu in IE, and blocks user access to windowsupdate.Microsoft.com.
      Registry Value: NoWindowsUpdate

    * Policy:Remove user folders from the Start Menu
      Description:Removes all user-specific folders except My Documents (My Pictures, My Music, Favorites, and Recent Documents) from the Start menu. Also removes the corresponding checkboxes from the Start menu customization CPL.
      Registry Value:This is a combination of the following: NoStartMenuMyMusic , NoSMMyPictures , NoFavoritesMenu , NoRecentDocsMenu

    * Policy:Prohibit user from changing user folder paths
      Description:Prevents users from changing the path to the My Pictures, My Music, Favorites, and Recent Documents folders.
      Registry Value: DisableMyPicturesDirChange , DisableMyMusicDirChange , DisableFavoritesDirChange .

    * Policy:Remove My Documents folder from the Start Menu
      Description:Removes My Documents folder from the Start menu and corresponding checkbox from the Start menu customization CPL.
      Registry Value: NoSMMyDocs

    * Policy:Prohibit user from changing My Documents path
      Description:Prevents users from changing the path to the My Documents folder.
      Registry Value: DisablePersonalDirChange

    * Policy:Remove Recent Documents item from Start Menu
      Description:Removes the Recent Documents folder from the Start menu. Also removes the corresponding checkbox from the Start menu customization CPL.
      Registry Value: NoRecentDocsMenu

    * Policy:Maximum number of recent documents
      Description:Specifies the number of shortcuts displayed on the Recent Documents submenu.
      Registry Value: MaxRecentDocs

    * Policy:Clear history of recent documents on exit
      Description:Deletes all shortcuts shown in the Recent Documents menu when the user logs off.
      Registry Value: ClearRecentDocsOnExit

    * Policy:Remove Favorites item from Start Menu
      Description:Prevents users from adding the Favorites item to the Start menu. Also removes the corresponding checkbox from the Start menu customization CPL.
      Registry Value: NoFavoritesMenu

    * Policy:Remove My Computer from the Start Menu
      Description:Removes the My Computer item from the Start Menu and the corresponding checkbox from the Start menu customization CPL.
      Registry Value: {20D04FE0-3AEA-1069-A2D8-08002B30309D} under HKCU\Software\Microsoft\Windows\CurrentVersion\Policies\NonEnum.

    * Policy:Remove Network Connections from the Start Menu
      Description:Removes the Network Connections item from the Start menu and the corresponding checkbox from the Start menu customization CPL.
      Registry Value: NoNetworkConnections

    * Policy:Remove Network Places from the Start Menu
      Description:Removes the Network Places item from the Start menu and the corresponding checkbox from the Start menu customization CPL.
      Registry Value: NoStartMenuNetworkPlaces

    * Policy:Do not add shares of recently used documents to Network Places
      Description:Remote shared folders are not added to Network Places whenever you open a document in the shared folder.
      Registry Value: NoRecentDocsNetHood

    * Policy:Remove Help item from Start Menu
      Description:Removes the Help item from the Start menu, but does not disable Help files from running.
      Registry Value: NoSMHelp

    * Policy:Remove Search item from Start Menu
      Description:Removes the Search item from the Start menu and disables some Windows Explorer search elements.
      Registry Value: NoFind

    * Policy:Remove Run item from Start Menu
      Description:Removes the ability to execute programs from the Run option on the Start menu, Task Manager, or by pressing Winkey + R. Also removes the corresponding checkbox from the Start menu customization CPL.
      Registry Value: NoRun

    * Policy:Add "Run in Separate Memory Space" check box to Run dialog box
      Description:Allows 16-bit programs to run in a dedicated Virtual DOS Machine (VDM) process.
      Registry Value: MemCheckBoxInRunDlg

    * Policy:Do not use the search-based method when resolving shell shortcuts
      Description:Prevents the system from conducting a comprehensive search of the target drive to resolve a shortcut.
      Registry Value: NoResolveSearch

    * Policy:Do not use the tracking-based method when resolving shell shortcuts
      Description:Prevents the system from using NTFS features to resolve a shortcut.
      Registry Value: NoResolveTrack

    * Policy:Force Logoff to the Start Menu
      Description:Forces the Logoff button to the Start menu and prevents users from removing the Logoff option from the Start menu.
      Registry Value: ForceStartMenuLogoff

    * Policy:Disable Logoff on the Start Menu
      Description:Removes the "Logoff" button from the Start menu and prevents users from adding the Logoff button to the Start menu.
      Registry Value: StartMenuLogoff

    * Policy:Disable and remove the Turn Off Computer button
      Description:Removes the "Turn Off Computer" button from the Start Menu and prevents shutting down Windows using the standard shutdown user interface.
      Registry Value: NoClose

    * Policy:Disable and remove the Undock PC command
      Description:Removes the "Undock PC" button from the Start Menu and prevents undocking of the PC (laptop).
      Registry Value: NoStartMenuEjectPC

    * Policy:Disable drag-and-drop menus on the Start Menu
      Description:Prevents users from modifying the Start menu by dragging and dropping items. Other methods of customizing the Start menu are still enabled.
      Registry Value: NoChangeStartMenu

    * Policy:Disable changes to Taskbar and Start Menu settings
      Description:Removes the Taskbar & Start Menu item from the Control Panel, and removes the Properties item from the Start menu (and button) context menu.
      Registry Value: NoSetTaskbar

    * Policy:Disable user tracking
      Description:Prevents the system from remembering the programs run, paths followed, and documents used.
      Registry Value: NoInstrumentation

    * Policy:Remove user name from Start Menu
      Description:Removes the user name from the Start menu.
      Registry Value: NoUserNameInStartMenu
Read more ...

Remove Unwanted applications from 'Open With' list


In windows, we open some files with other supported applications too.. like mp3 files we can open with winamp, media player, itune, or many other mp3 players...
Now here ill tell you hack for how to remove unwanted applications from this open with list..
This is very simple n useful trick

Settings:-

  1. Run > regedit > hit Enter
  2. Registry > My Computer > HKEY_CLASSES_ROOT > Applications
  3. When you expand 'Applications' key then you will see a long sub keys list of program names like accwiz.exe, BitTorrent.exe, n something like more list..
  4. Then select a application key which you want to remove from 'Open with' list..(e.g.- i selected 'flash.exe' to remove from list)
  5. Right click in right side pane in blank area or go to Edit> New
  6. Add New> 'String Value' (REG_SZ)
  7. Change name of string value as 'NoOpenWith' (case-sensitive)
  8. We Don't need to set any value data for this string..
  9. Refresh your desktop n check open with list for any file..


Done.. :-)

Read more ...

Blocking specific files in Autoplay Drives

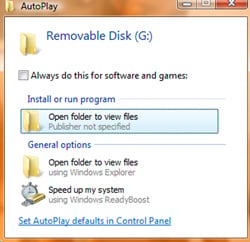
When AutoPlay is activated n our Data CD/DVD or flash drives inserted, Windows will execute an Applications which is configured in autorun.inf.
Mostly all viruses travels from autorun to system directory or drive

Here i will tell you how to block specific files from autoplay instead of Disabling Autoplay system.
Settings:
  1. Run > regedit
  2. Go to HKEY_LOCAL_MACHINE\SOFTWARE\Microsoft\Windows\CurrentVersion\Explorer\AutoplayHandlers\CancelAutoplay\Files
  3.  Add New String value and name it with application name which you want to block. E.g.- Some bad coders use shell32.exe (system contains shell32.dll, see the difference between .exe n .dll) to execute virus from autorun.inf
  4. (Note:- shell32.exe, run32.exe, ntdetect1.exe these used to run virus cause system contains this named dll) so to block shell32.exe from autorun i'll add new string value - name 'shell32.exe' to block any other applications which contains 32.exe, so ill add '*32.exe'
  5. You can block any file formats, e.g- vb scripts like 'killtask.vbs' or you can set '*fun*' something like for blocking fun.exe
  6. read by default string names to better understand..
Cheers..)

Read more ...

How To Prevent Programs From Stealing Focus in Windows

When programs start stealing focus, they "pop up" in front of the window that you're currently viewing. A default setting in Windows prevents this from happening. If programs are stealing focus from your current window then this setting has been changed.

Note: Changes to the Windows Registry are made in these steps. Take great care in making only the changes described below. I recommend that you backup the registry keys you're modifying in these steps as an extra precaution.

Here's How:
  1. Click on Start and then Run.
  2. In the text box in the Run window, type regedit and click OK. This will open the Registry Editor program.
  3. Locate the HKEY_CURRENT_USER folder under My Computer and click on the (+) sign next the folder name to expand the folder.
  4. Continue to expand folders until you reach the HKEY_CURRENT_USER\Control Panel registry key.
  5. Select the Desktop key under Control Panel.
  6. On the right-hand side of the screen, locate and double-click on the ForegroundLockTimeout DWORD.
  7. In the Edit DWORD Value window that appears, set the Value data: field to 30d40. Note: Make sure the Base option is set to Hexadecimal when entering the DWORD value.
  8. Click OK and then close Registry Editor.
  9. Reboot your PC for the changes you made to take effect.
  10. From this point forward, programs should no longer steal the focus from the window that you're currently working in.
Read more ...

How To Change the Windows XP Product Key


Changing the Windows XP product key may be necessary if you discover your current key is pirated or illegal but you don't want to reinstall Windows XP to activate your new legal key.

Note: Changes to the registry are made in these steps. Take great care in making only the changes described below. I recommend that you backup the registry keys you're modifying in these steps as an extra precaution.

Here's How:
  1. Click on Start and then Run.
  2. In the text box in the Run window, type regedit and click OK. This will open the Registry Editor program.
  3. Locate the HKEY_LOCAL_MACHINE folder under My Computer and click on the (+) sign next the folder name to expand the folder.
  4. Continue to expand folders until you reach the HKEY_LOCAL_MACHINE\Software\Microsoft\WindowsNT\Current Version\WPAEvents registry key.
  5. Click on the WPAEvents folder.
  6. In the results that appear in the window on the right, locate OOBETimer.
  7. Right-click on the OOBETimer entry and choose Modify from the resulting menu.                                  
  8. Change at least one digit in the Value data text box and click OK. This will deactivate Windows XP. Feel free to close Registry Editor at this point. 
  9. Click on Start and then Run.
  10. In the text box in the Run window, type the following command and click OK. %systemroot%\system32\oobe\msoobe.exe /a
  11. When the Let's activate Windows window appears, choose Yes, I want to telephone a customer service representative to activate Windows and then click Next.
  12. Click the Change Product Key button at the bottom of the window. Don't worry about filling anythingout on this screen.
  13. Type your new, valid Windows XP product key in the New key: text boxes and then click the Update button.     
  14. You should now reactivate Windows XP by following the instructions on the Activate Windows by phone window which you should now be seeing or via the Internet by clicking the Back button and following the instructions on that screen. If you'd rather postpone activating Windows XP until a later date, you can click the Remind me later button.
  15. After activating Windows XP, you can verify that activation was successful by repeating steps 9 and 10 above.

The Windows Product Activation window that appears should say "Windows is already activated. Click OK to exit."

Read more ...

What is MAC Address?

A Media Access Control address (MAC address) is a unique identifier assigned to network interfaces for communications on the physical network segment. MAC addresses are used for numerous network technologies and most IEEE 802 network technologies, including Ethernet. Logically, MAC addresses are used in the Media Access Control protocol sub-layer of the OSI reference model.

MAC addresses are most often assigned by the manufacturer of a network interface card (NIC) and are stored in its hardware, the card's read-only memory, or some other firmware mechanism. If assigned by the manufacturer, a MAC address usually encodes the manufacturer's registered identification number and may be referred to as the burned-in address. It may also be known as an Ethernet hardware address (EHA), hardware address or physical address. A network node may have multiple NICs and will then have one unique MAC address per NIC.
Read more ...

What is IP Address?

An Internet Protocol address (IP address) is a numerical label assigned to each device (e.g., computer, printer) participating in a computer network that uses the Internet Protocol for communication.An IP address serves two principal functions: host or network interface identification and location addressing. Its role has been characterized as follows: "A name indicates what we seek. An address indicates where it is. A route indicates how to get there."
The designers of the Internet Protocol defined an IP address as a 32-bit number and this system, known as Internet Protocol Version 4 (IPv4), is still in use today. However, due to the enormous growth of the Internet and the predicted depletion of available addresses, a new version of IP (IPv6), using 128 bits for the address, was developed in 1995. IPv6 was standardized as RFC 2460 in 1998, and its deployment has been ongoing since the mid-2000s.

IP addresses are binary numbers, but they are usually stored in text files and displayed in human-readable notations, such as 172.16.254.1 (for IPv4), and 2001:db8:0:1234:0:567:8:1 (for IPv6).
Read more ...

How do you make your own file extension n file type?

This registry setting allows you to add a new file extension and file type that is currently not not available in your windows system, and adds inside your right click 'New' context menu .

Many time we needs a file to store our personal data, notes, reminders, appointments etc.. n which wants to identify easily in our system files..

By using this setting you can make your own file type n extension for your daily use :)
                               
Settings:
(Dont use single or double quotes in complete setting)
1] Start > Run > regedit> hit Enter
2] Select HKEY_CLASSES_ROOT key..
3] Right Click> New > Key (add New key at HKEY_CLASSES_ROOT)
4] Write your file extension like '.note' ( or any other which you want, but use dot "." before extension, i used .note )
5] on right side pane double click on (Default) to modify '(Default)' value to file write as 'notefile'
(Do not use any spaces between file type value, you can use any other value too like myfile, mynotes so on..)
You just added file extension, now you need to set data for your file type..
6] Now go back to HKEY_CLASSES_ROOT key..
7] Create New Key by right click
8] write 'notefile' as key name ( we used 'notefile' is file type for our extension, which is same as where we set step 5, if you used any other file type write this same value as your key name)
9] On right side pane, double click on '(Default)' n set description for your file Like 'My note file'
( here you can use spaces)
10] then right click in blank space at right side pane n add new DWORD value, write 'BrowserFlags' as name, double click on BrowserFlags to modify n set Hexadecimal value '8' (Eight)
11] add another new DWORD value, name it 'EditFlags' n set Hexadecimal value '0' (Zero)
12] Select 'notefile' > add new Key > write key name - 'DefaultIcon'
13] on right side pane double click on '(Default)' n write path of your icon file for your extension
like 'C:\WINDOWS\myicon.ico'
14] Select notefile key, add new Key n name it 'shell'
15] Select shell Key, add new Key n name it 'Open'
16] Select Open key, add new key n name it 'command'
now you are here- 'HKEY_CLASSES_ROOT\notefile\shell\Open\command', ok?
17] Now on right side pane select '(Default)', double click to modify, n now right the path of application for your file type, like 'C:\WINDOWS\notepad.exe %1'
18] Now we want to add our file type inside right click New menu so go back at '.note' key
19] select '.note' key, add new Key n name it 'ShellNew'
20] On right side pane, right click in blank space n add new String value, name it 'NullFile'
(Dont set any value for this Nullfile, leave blank)


Read more ...

Add custom folder in 'SendTo'

Everybody has own custom folder in his computer to save, collect, work, music and for anything else, we use one or few more folder always for whatever we save or work...
So i wanna tell you one trick for 'How to add our favorite folder in SendTo menu'


There is no any trick in registry to add this context menu.. :-)
We just need to add shortcut of our folder in users SendTo shell folder..

Lets Start,

Settings:
1] go to Start> Run
2] Enter '%USERPROFILE%\SendTo' and hit Enter...
3] Then right click in anywhere in blank space in this folder...
4] Add new shortcut from New menu
5] It brings 'create shortcut' window...
6] browse in select your folder which you want in SendTo.. n Next
7] Name it what u want and press finish
8] Now select your shortcut folder > Right click > Properties
9] select shortcut tab, and 'change icon' for this shortcut folder...
10] Refresh your desktop and check your SendTo menu... :-)

[Note: SendTo menu only copy your files n folders, never move your file]


Read more ...

How to Remove 'sendto' option from right click menu

This setting allows you to Remove 'sendto' option from right-click menu (context menu).
  1. Run > Regedit > hit Enter
  2. Registry > My Computer > HKEY_CLASSES_ROOT > selectAllFilesystemObjects
  3. AllFilesystemObjects > shellex > ContextMenuHandlers
  4. ContextMenuHandlers > select Send To
  5. now right side pane double click on '(Default)'
  6. Add '-' (minus sign) in front of {7BA4C740-9E81-11CF-99D3-00AA004AE837} like this ' -{7BA4C740-9E81-11CF-99D3-00AA004AE837}'
  7. Now refresh your Desktop n check right click menu.. :)
Read more ...

Disable Autorun


In the left pane, navigate to:
HKEY_CURRENT_USER\Software\Microsoft\Windows\CurrentVersion\Policies\Explorer.

With Explorer highlighted, in the right-pane right click the value NoDriveTypeAutoRun and select Modify from the drop down menu. The base value will be set to Hexadecimal. If not, select Hexadecimal.

Type 95 and click OK.
Note that this will stop Autorun on removable/USB drives, but still allow it on CD ROM drives. If you want to disable autorun on both, substitute b5 for the 95.

95 : Disable For CD Nd PD
b5 : Disable All
91 : Enable All

Read more ...

Disable Folder Options

Steps to disable folder options are:-

1. Open the Start Menu.
2. In the white line (Start Search) area, type regedit and press Enter.
3. In regedit, go to:

User Key: [HKEY_CURRENT_USER\Software\Microsoft\Windows\CurrentVersion\Policies\Explorer]
System Key: [HKEY_LOCAL_MACHINE\Software\Microsoft\Windows\CurrentVersion\Policies\Explorer]
Value Name: NoFolderOptions
Data Type: REG_DWORD (DWORD Value)
Value Data: (0 = show options, 1 = hide options)
Read more ...

Disable Task Manager


NOTE: This method will work for all Vista versions.
1. Open the Start Menu.
2. In the white line (Start Search) area, type regedit and press Enter.
3. Click on the Continue button in the UAC prompt.

4. In regedit, go to:
NOTE: If you do not have System, then right click on Polices and click on New and Key. Type System and press Enter.
Code:
HKEY_CURRENT_USER\Software\Microsoft\Windows\CurrentVersion\Policies\System

5. To Disable Task Manager -
A) In the right pane, right click on a empty area and click on New and DWORD (32-bit) Value and type DisableTaskMgr and press Enter.
B) Right click on DisableTaskMgr and click on Modify.
C) Type 1 and click on OK.

6. To Enable Task Manager -
A) In the right pane, right click on DisableTaskMgr and click on Delete.
B) Click on Yes to confirm delete.

7. Close regedit.

Read more ...

Disable CMD

Disable cmd prompt:
(HKLM or HKCU)\\Software\\Policies\\Microsoft\\Windows\\System

DisableCMD=DWORD

Set to 1 to disable the cmd prompt but allow batch files.
Set to 2 to disable cmd and batch files
Read more ...

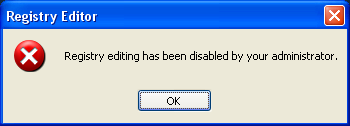
Disable Registry Editor

Disable:

HKEY_CURRENT_USER\SOFTWARE\Microsoft\Windows\CurrentVersion\Policies\System

Change the following value: DisableRegistryTools

Set it to 0 to allow regedit
Set it to 1 to disable regedit

Enable:

1. Click Start>Run
2. Cut and paste on Run “field” the line below to Unlock Registry Editor.

REG add HKCU\Software\Microsoft\Windows\CurrentVersion\Policies\System /v DisableRegistryTools /t REG_DWORD /d 0 /f


Read more ...

Disable Writing To USB

 
Start | Run | Type: regedit | Click OK |
Navigate to >>>

[HKEY_LOCAL_MACHINE\SYSTEM\CurrentControlSet\Control\StorageDevicePolicies]
“WriteProtect”=dword:00000001

Read more ...

Disable Writing To CD


If XP Pro or Home, edit the registry...

Start | Run | Type: regedit | Click OK |
Navigate to >>>
HKEY_CURRENT_USER\Software\Microsoft\Windows\Curre ntVersion\
Policies\Explorer
Value Name: NoCDBurning
Data Type: REG_DWORD (DWORD Value)
Value Data: 0 or 1
0 = Allow CDR
1 = Disable CDR
Create a new DWORD value, or modify the existing value, called 'NoCDBurning' and edit the value according to the settings above.

Read more ...

Drive icon And Label Works

To change the icon displayed within explorer for a drive requires changes to the windows registry.

Create (if it does not already exist) the registry key:
HKEY_LOCAL_MACHINE\ SOFTWARE\ Microsoft\ Windows\ CurrentVersion\ Explorer\ DriveIcons\ X\ DefaultIcon

where 'X' is the drive letter of the drive for which you wish to change the drive icon.

Change the key's default value to hold the fully qualified name of the icon file (e.g. 'c:\myicons\cdrive.ico').
If the file contains more than one icon then follow it with a comma and the zero-based index of the icon (e.g. 'c:\myicons\mylib.dll,2').

To see the affect restart windows - although, depending on the version of windows simply refreshing the window might be sufficient.


--------------------------------------------------------------------------------

From Windows 2000 onwards it is also possible to change the default label shown for each drive.

Navigate to (or create):
HKEY_LOCAL_MACHINE\ SOFTWARE\ Microsoft\ Windows\ CurrentVersion \ Explorer\ DriveIcons\ X\ DefaultLabel
where 'X' is the drive letter of the drive for which you wish to change the label.

Change the key's default value to hold the required label.

--------------------------------------------------------------------------------

The icon displayed for a cd (or zip) drive is normally taken from the media that it holds. To specify the icon that should be used:

Copy the icon file (IconName.ico) to the root directory (i.e. the top directory) of the cd. (Any name will do, but it must be an icon file and have a ‘.ico’ file extension.)
Create the file ‘AUTORUN.INF’ in the root of the drive, it should contain: [autorun]icon = IconName.ico

The change will be visible the next time cd is placed into a drive.

Read more ...

Hide Drives


Open your registry and find or create the key below.
Registry Settings
User Key: [HKEY_CURRENT_USER\Software\Microsoft\Windows\CurrentVersion\Policies\Explorer]
System Key: [HKEY_LOCAL_MACHINE\Software\Microsoft\Windows\CurrentVersion\Policies\Explorer]
Value Name: NoDrives
Data Type: REG_DWORD (DWORD Value)

The "NoDrives" value uses a 32-bit word to define local and network drive visibility for each logical drive in the computer. The lower 26 bits of the 32-bit word correspond to drive letters A through Z. Drives are visible when set to 0 and hidden when set to 1.

If your not happy working in Hex, add these decimal numbers to hide the drive(s):
A: 1, B: 2, C: 4, D: 8, E: 16, F: 32, G: 64, H: 128, I: 256, J: 512, K: 1024, L: 2048, M: 4096, N: 8192, O: 16384, P: 32768, Q: 65536, R: 131072, S: 262144, T: 524288, U: 1048576, V: 2097152, W: 4194304, X: 8388608, Y: 16777216, Z: 33554432, ALL: 67108863
For example to hide drive A and drive D, you would add 1 (A) + 8 (D) which means the value should be set to "9".

To disable all the drives set the value to "67108863".
Restart Windows for the change to take effect.

Note: These drives will still appear in File Manager, to remove File Manager, delete or rename winfile.exe.
Read more ...

Write Name Instead of Start


1. First, you'll need a tool called Resource Hack for the job. You can find it here. Download the file and save it in permanent folder.

2. Open Resource Hack tool and locate the file explorer.exe in C:\Windows. But make sure to back up the file before modify it.(just in case)

3. Click on String Table folder, go to sub-folder number 37 and click the 1033 entry.Highlight the start text (Don't include the quotes) and name it at your own choice. For example, we name it as User1. Click at compile script button and save it as explorerUser1.exe.

4. Go to regedit and locate this entry;
HKEY_LOCAL_MACHINE>Software>Microsoft>Windows NT>Current Version>Winlogon > Search for entry named "shell", the default value data is explorer.exe. Rename the entry as explorerUser1.exe or whatever you named your explorer.exe in step 3.

5.Close the registry editor, log off your pc and log back again.You'll see the results.

Read more ...

Communities of Hackers


Communities of Hacking are:-
1. Hackers
Hackers are Intelligent Computer Professionals.
Motive/Intent –

  • To gain in-depth knowledge of a system, what’s happening at the backend, behind the screen.
  • To find possible security vulnerabilities in a system.
  • They create security awareness by sharing knowledge. It’s a team work.

2. Crackers
An Individuals who break into computers with malicious intent.
•Motive/Intent –

  • To seek unauthorized access into a system and cause damage or destroy or reveal confidential information.
  • To compromise the system to deny services to legitimate users for troubling, harassing them or for taking revenge.

Effects- Can cause financial losses & image/reputation damages,
defamation in the society for individuals or organizations

3. Phreaks
These are persons who use computer devices and software to break into phone networks.
•Motive/Intention- To find loopholes in security in phone network and to make phone calls at free of cost!!!
•Effects- You may have to big amount of phone bills, for doing nothing!!!

4. Script Kiddies
These are persons not having technical skills to hack computers.
•Motive/Intention- 

  • They use the available information about known vulnerabilities to break into remote systems.
  • It’s an act performed for a fun or out of curiosity

Read more ...

Types of Hackers?


White Hat Hacker:
White Hat hackers are good guys who does the hacking for defensing.  They probably work an organization for providing security.

They use their knowledge and skill set for good, constructive intents. They find out new security loopholes and their solutions.
E.g.- LIKE ME.. As I’m Doing It Right Now ( I Hope So!!!)


Black Hat Hacker

  • Black hat hackers are bad guys(the malicious hackers or crackers).  They usually steal the other bank information and steal the money.
  • They use their skills for illegal purposes.
  • They are creators of viruses,malware,spyware.
  • They will destroy your pc.
E.g.- to gain money (online robbery), to take revenge. Disgruntled Employees is the best example of Black Hats. Attackers (Black Hat Hackers) are not at all concerned with security professionals (White Hat hackers). Actually these hackers are Bad Guys!!!

Gray Hat Hackers

  • Grey hats are hackers who may work offensively or defensively, depending on the situation.
  • This is the dividing line between hacker and cracker. Both are powerful forces on the Internet,and both will remain permanently. And some individuals qualify for both categories. The existence of such individuals further clouds the division between these two groups of people.
  • In addition to these groups, there are self-proclaimed ethical hackers, who are interested in hacker tools mostly from a curiosity standpoint. They may want to highlight security problems in a system or educate victims so they secure their systems properly. These hackers are doing their “victims” a favor. For instance, if a weakness is discovered in a service offered by an investment bank, the hacker is doing the bank a favor by giving the bank a chance to rectify the vulnerability.
Read more ...

What is Hacking?

The Art of exploring various security breaches is termed as Hacking.It is an anti-society activity and it says, there always exists more than one way to solve the problem.
 

Hacking is the process of taking advantage of weakness in a computer or computer network to accomplish his goal. The person who is engaging in hacking activities  called as 'Hacker'.  Hackers may be motivated by a multiple reasons, such as profit, protest, challenge or just for fun.

In the computer security context, a hacker is someone who seeks and exploits weaknesses in a computer or computer network. Hackers may be motivated by a multitude of reasons, such as profit, protest, or challenge. The subculture that has evolved around hackers is often referred to as the computer underground and is now a known community. While other uses of the word hacker exist that are not related to computer security, such as referring to someone with an advanced understanding of computers and computer networks, they are rarely used in mainstream context. They are subject to the long standing hacker definition controversy about the true meaning of the term hacker. In this controversy, the term hacker is reclaimed by computer programmers who argue that someone breaking into computers is better called a cracker, not making a difference between computer criminals (black hats) and computer security experts (white hats). Some white hat hackers claim that they also deserve the title hacker, and that only black hats should be called crackers.


Read more ...